
Using the Flash
Master Using the Flash | Photography Lighting Tips
Learn how to use your camera flash effectively for natural, well-lit photos. Discover techniques for balancing light, reducing harsh shadows, and improving your indoor and outdoor photography.
The Flash on Your Camera
Master Using the Flash | Photography Lighting Tips
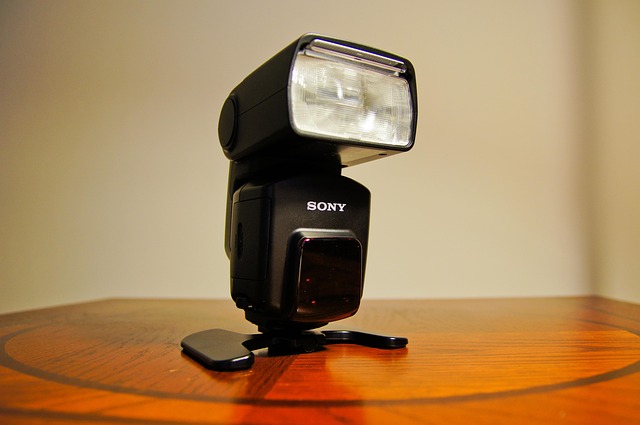
If you have your DSLR camera or equivalent close by, compare your camera’s flash modes with the advice on this page. Remember that terms for camera modes may slightly vary with each manufacturer.
Understanding Flash
Master Using the Flash | Photography Lighting Tips
Understanding Flash Photography
Using flash in photography allows you to control and enhance lighting in any environment. A camera flash helps illuminate subjects in low-light conditions, reduce harsh shadows, and add a professional touch to portraits and product shots. It’s not just for dark settings — flash can also be used outdoors to fill in shadows caused by bright sunlight. Understanding when and how to use flash effectively gives you more creative control and ensures your images are evenly lit, detailed, and visually balanced.
Tips for Effective Flash Use
To achieve natural-looking results, avoid pointing your flash directly at the subject. Instead, use techniques like bouncing the flash off walls or ceilings, or attach a diffuser to soften the light. Adjusting flash power manually also prevents overexposure and maintains proper contrast. Combining flash with ambient light can create depth and mood, making your photos look more dynamic. Whether you’re shooting portraits, events, or landscapes at dusk, mastering flash photography helps you bring out the best in every scene — even when lighting conditions aren’t ideal.
Why Use Flash?
• Illuminate Low-Light Scenes: Flash provides the necessary light to capture clear and bright photos in dim environments.
• Fill Shadows: It helps in reducing harsh shadows caused by strong lighting.
• Freeze Motion: A quick burst of light can freeze fast-moving subjects, capturing sharp images
01

Types of Camera Flash
1. Built-In Flash: Integrated into the camera body, it’s convenient but often less powerful and versatile.
2. External Flash (Speed light): Offers more power, control, and flexibility. Ideal for professional photography.
3. Studio Strobes: High-power lights used in controlled studio environments for portrait and product photography.
02

Basic Flash Photography Tips
1. Avoid Direct Flash: Direct flash can create harsh shadows and flat images. Use a diffuser or bounce the flash off a ceiling or wall to soften the light.
2. Use Fill Flash: In bright sunlight, use fill flash to light up shadows on your subject’s face.
3. Adjust Flash Power: Control the flash output to match the ambient light and avoid overexposure.
03
Advanced Flash Techniques
1. Bounce Flash:
Bouncing flash off a surface (like a wall or ceiling) creates a softer, more natural light. This technique reduces harsh shadows and produces even lighting.
2. Off-Camera Flash:
Using an off-camera flash allows you to position the light source at different angles, creating more dynamic and three-dimensional images. Wireless triggers or cables can help with this setup.
3. High-Speed Sync (HSS):
HSS allows you to use flash at shutter speeds higher than the camera’s sync speed. This is particularly useful for outdoor portraits, enabling you to balance bright ambient light with flash.
4. Rear Curtain Sync:
Rear curtain sync fires the flash at the end of the exposure. This technique is excellent for capturing motion trails behind moving subjects, adding a sense of movement to your photos.
04
Advanced Flash Techniques
When selecting flash equipment, consider the following factors:
• Power Output: Measured in guide numbers; higher numbers indicate more powerful flashes.
• Recycle Time: The time it takes for the flash to recharge between shots.
• TTL (Through-The-Lens) Metering: Automatically adjusts the flash output based on the camera’s exposure settings.
• Compatibility: Ensure the flash is compatible with your camera brand and model.
05
Flash Scenarios
1. Portrait Photography:
Use a softbox or umbrella with an off-camera flash to create soft, flattering light for portraits. Position the flash at a 45-degree angle to the subject for a classic portrait look.
2. Event Photography:
A speedlight with a diffuser is ideal for events. Bounce the flash off the ceiling to spread light evenly across the room, avoiding harsh shadows.
3. Macro Photography:
Ring flashes or twin flashes provide even illumination for close-up shots, reducing shadows and highlighting intricate details.
Common Flash Photography Mistakes to Avoid
• Red-Eye Effect: Occurs when the flash is too close to the lens. Use red-eye reduction mode or position the flash away from the camera.
• Overexposure: Adjust the flash power and use diffusers to prevent washed-out images.
• Ignoring Ambient Light: Balance flash with ambient light for a natural look, avoiding a stark contrast between the subject and background.
06
Conclusion: Enhancing Your Photography Journey
Master Using the Flash | Photography Lighting Tips
Mastering the use of flash on a camera can transform your photography, allowing you to capture well-lit, professional-quality images in any lighting condition. Experiment with different techniques and equipment to find the best setup for your style and needs.